Self-tanning is a convenient and easy way to achieve a golden goddess glow without having to bake under UV rays for hours and risk developing skin cancer and other skin conditions.
Spray tans, gradual tan mousses, and lotions are all competing for the number one spot as the best self-tanning product. They all allow you to cover your skin’s imperfections and achieve a beautiful sunless tan. However, the results you get from using these products vary and depend on how well you use them.
Today, we bring you a detailed guide on self-tanning that’ll help you become a seasoned self-tanner. The steps outlined below will guide you through the best products to use as well as tips to help you achieve the perfect tan without patches or streaks.
Table of Contents
- Step 1 - Select the Best Self-Tanning Product
- Step 2 - Remove Body Hair at Least 24 Hours Before
- Step 3 - Exfoliate Your Whole Body
- Step 4 - Dry Off and Moisturize
- Step 5 - Apply the Gradual Tan
- Frequently Asked Questions
Step 1 - Select the Best Self-Tanning Product
Before you can think of how to start self-tanning you must decide on the product you’ll be using.
The two best formulas when doing it yourself are tanning lotion and mousse. The table below compares the two to help you pick the best formula for your skin type and needs.
| Lotion | Mousse |
|
|
Our pick for the best self-tanning product is a gradual tanning lotion. Here’s why:
- It delivers a subtle golden glow day after day.
- It’s suitable for people with dry and sensitive skin.
- It allows you to build and control the depth of your tan.
- Unlike the traditional tan, it won't leave you with stained clothes or sheets.
Step 2 - Remove Body Hair at Least 24 Hours Before
A very easy step to ignore or forget prior to the self-tanning process is hair removal.
Hair removal prior to tanning is important because tan adheres better and more evenly on smooth skin. Furthermore, shaving or waxing lightly exfoliates the skin, therefore, doing it post-self-tanning may remove your hard-earned sunless tan.
Again, the timing of your shave or wax appointment is crucial. It should be at least 24 hours before you apply your self-tanner to give your pores enough time to close. If done later, the tanner may sink into the loosened hair pores, creating unsightly dark spots and an uneven finish.
Step 3 - Exfoliate Your Whole Body
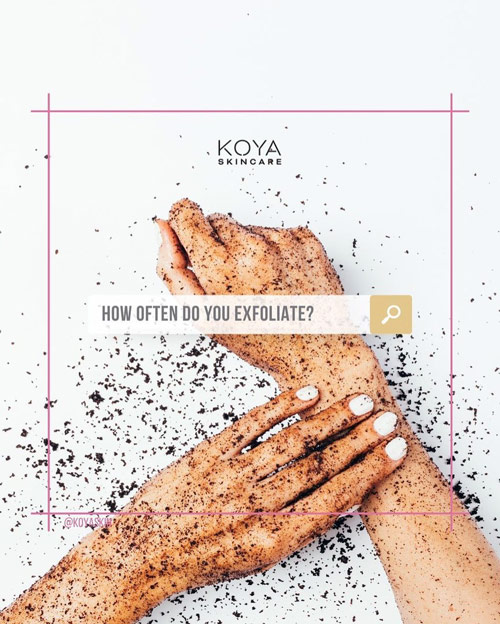
Dead skin is the enemy of a flawless self-tan.
Applying a gradual self-tan to dead skin results in a patchy finish. Dead skin cells soak up the active ingredient in self-tanning products—DHA—to create dark patches that look unnatural. Additionally, when you exfoliate, your tan is likely to last longer because you won't be tanning skin cells that'll soon be shed.
Therefore, you must exfoliate to eliminate dead skin before you can go in with your tanner. A washcloth, loofah, or exfoliating mitt are the best products to use for exfoliating as they leave your skin looking and feeling smooth and fresh without depositing a layer of oil.
This means you must also avoid oil-based face and body exfoliants and scrubs because they prevent the tanner from absorbing evenly.
Oil-based products also leave a residue on the skin surface, which results in streaks when you apply your tanner and inhibits the binding of DHA to the outermost layer of the skin.
Expert Tip: When exfoliating, pay special attention to the areas with thick and coarse skin, like the elbows, knees, ankles, and heels.
Something else, when using a gradual tan lotion, you’ll need to continue exfoliating every 2–3 days even after the first application. This helps you achieve a consistent and natural-looking faux glow.
Step 4 - Dry Off and Moisturize
Your skin needs to be completely dry before applying any tanning products because any water on the surface will dilute the tan and leave you with dreaded streaks.
However, your skin needs to be well-hydrated and moisturized because tanning agents tend to cling and form patches around very dry areas.
Dry skin also has a tendency to absorb excess tan, but you can beat this by ensuring you use a nourishing and hydrating moisturizer every day for the days leading up to a tan application.
It also helps if you use a natural tan with hydrating and moisturizing properties formulated to improve both the health and appearance of your skin.
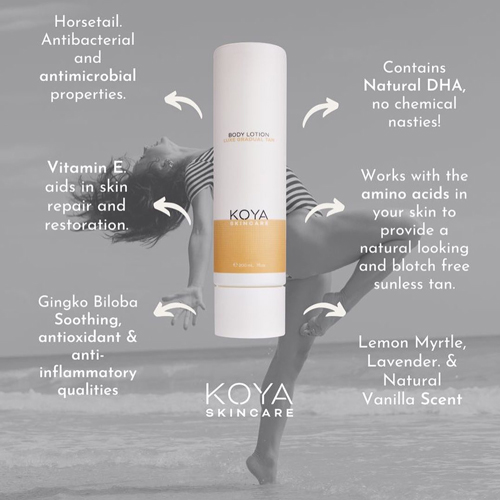
The KOYA Skin Luxe Tan is a unique gradual tan lotion that gives you healthy skin and helps you achieve that dreamy, natural-looking, and blotch-free sunless tan.
“Only one application was needed for a light bronze look that lasted a week…it didn't look like a fake tan was used.”
— Brad Harris
It’s also important that you concentrate on moisturizing the dry areas on your body, such as your elbows, knees, ankles, feet, wrists, palms, and hands. This will help to prevent ugly color build-up, the appearance of harsh lines, and will ensure you achieve a flawless finish.
Step 5 - Apply the Gradual Tan
Applying your gradual tan to perfection is an art in and of itself.
If we were talking about a tanning mousse, we advise you to go in with a mitt to achieve a streak-free application and avoid staining your hands.
However, when using a gradual tan, especially the KOYA Skin Luxe Tan, you can skip that step and go in with your good ol’ hands.
Here are some tips to help you achieve a perfect tan:
- Start from the bottom, making your way up. Ideally, start with your ankles and move in circular motions as you make your way to your legs, thighs, torso, hands, and arms. This motion helps you prevent marks and lines when you bend over.
- Apply any leftover self-tanner to your feet.
- Use long sweeping strokes to ensure the color is evenly distributed and to prevent streaks and patches.
- Massage your gradual self-tanner in circular motions and blend carefully around the wrists, ankles, knees, and elbows to achieve the most natural-looking faux glow.
The KOYA Skin Gradual Luxe Tan is safe to use on your face because it’s made using nature-derived ingredients and natural fragrances. However, you should not apply this tanner to your face as you normally would your bronzer—only concentrating on the high points of the face.
Instead, apply it everywhere, not missing your neck, eyelids, under the eyes, behind the ears, and at the tip of the ears.
Our favorite thing about this gradual tan is that you have full-color control—you can always go in with a little more on areas you need more depth.
Frequently Asked Questions
How do you make your sunless gradual tan last longer?
It's simple: Top up.
The fact that a gradual tan is infused with moisturizers allows you to incorporate it into your daily skin routine. Applying it every day or a few days a week will help you achieve a consistent yet controlled faux glow.
Pairing the Luxe Tan with a moisturizer like our Aussie Lemon Myrtle lotion will also help you avoid the peeling or cracking of your tan, ensuring it lasts longer.
How soon can I expect results?
You'll notice a light natural glow after your first application, then in a week or less, you'll notice a consistent golden goddess glow.
However, environmental factors, your level of skin hydration, and other products you are using on your skin will determine how soon you start enjoying the sun-kissed glow.
Can I use gradual tan when pregnant?
Yes. The KOYA Skin Luxe Tan and many other gradual tans are safe to use when pregnant or breastfeeding. This is because the little DHA in these products isn't absorbed by the body to cause the unborn or breastfed baby any harm.
Share on Facebook: